Less than 1 minute ago
|
09/10 winter project..... 2005 R6 stunt build
|
|||||||||
|
Less than 1 minute ago
\r\n \r\n Yamaha throttle boddies use a suction piston type fuel injection that has slides just like alot of carbs, thats why they have diaphragms and look like carbs...\r\n
Less than 1 minute ago
\r\n \r\n this is the kleen air mod i found and was going to do this weekend...
\nhttp://www.all-out-motorsports.com/f...ead.php?t=3597 \n \nis there a difference between the two?\r\n
Less than 1 minute ago
\r\n \r\n Here\'s the link...
\n \n \nThis may work for other years, but is based on an 03. Credit goes out to Greg Moon for his insight on this one. \n \n(1) Remove the AIS solenoid pictured below. Ziptie back the connector so it doesn\'t end up in your cooling fan. \n \n(2) Remove hoses #1 and #2 from the solenoid, you will be reusing them. \n \n ![]() \n \n(3) Reconnect #1 and #2 back to the nipples on the two breather covers on top of the motor. \n \n(3) Using a plastic or brass T fitting found at either your hardware store or auto parts store, connect #1 and #2 to #4. (#4 is roughly 2.5 to 3 feet long) \n \n(4) Connect the remaining end of #4 to the crankcase vent located behind the throttle bodies and facing straight up. \n \n(5) ****EDIT***** Do not add the #3 hose...leave the two nipples connected to the air box! \n \n(6) Cap off the 2 inlets on the airbox where the hoses used to hook up. \n \n ![]() \n \nThat\'s it, you\'re done \r\n
Less than 1 minute ago
\r\n \r\n thanks to everyone above for the good words on the bike
![]() \n \n \r\n thanks bro! Quote: \r\n
\n \ndual cal 4 piston bracket - hohey makes the regular bracket for dual single piston calipers. they used to make the same braket modified so you could use a 4 piston instead (but they stopped making that one). \n \nnow the only other option from hohey if you want to run a 4 piston for your HB is a "big rotor kit". you get the hohey bracket, line, and star bigger waved rotor. \nhttp://hoheydesigns.com/archives/cat...a/2003-2009-r6 \n \nbenitfits....... \n1. No brake pad trimming required for 4 piston applications \n2. Greater heat dissipation throughout braking system (longer brake fluid life) \n3. Added braking power \n4. More consistency in braking performance under all conditions \n \ndraw backs - cost more money \n \n \nscrapeworks subframe - i got it from GE nick (he hooked me up, thanks agin bro!!). he wanted to sell his R6, so he decided to try to bring it back to stock. since my subframe and seats were mint, he traded me straight up his star custom front and rear seats (custom cut, padded and wrapped) and scrapeworks subframe or my stockers. it was a sweet deal, the scrapeworks is SOLID!!!!! as far as i know there out of business, but im not 100% on that. \n \nclean air mod - check out the next post i post up for that one. ive never done it before and did it different than most guys. i havent rode the bike for more than 30 min yet so i still need to test and tweek a few things on the bike. not sure if its better than the other set up yet. im looking into it. \n \n \r\n yeah, i know.. if i go FF in the future its getting choppedQuote: \r\n
\n \nRSC - like i said i havent really had seat time on here..... but it feels way easier than stock, and easier than a few MSR\'s ive rode. but not as EZ as some others, the R6 is known to have a heavy pull. but this on seems managable. i think its easier that the MSR. i loike it a lot so far. \n \nkeep in mind you, dave, and neal are on a different level of riding than me. so take my opinion for what it is..... been riding for over 5 years, also messed with fiddys for a while. but ive only been stunting big bikes since winter 09 and havent been on one since september, then move to a supermoto til i got my R6 up...... SS and FIS idle is about all i had.....lol and starting to turn idle O\'s on the wr250x, but thats it. \n \n \r\n i oringinaly had hot bodies flush mounts on the sid farings. what i did was removed them and drilled 2 holes in the acerbis headlight.Quote: \r\n
\n1 hole - for the threaded stud to bolt it on \n2nd hole - for the wire to go through \n \n \r\n the R6 is a 1/5 turn throttle (or 1/4, but i think 1/5). so basicly with the R6 its only a little turn or twist of the wrist to get to WOT (wide open throttle) which is great for the track, but not so great for thottle control at BP. Quote: \r\n
\n \nthe f4i is a 1/6 turn throttle. so instead of a little twist and all the sudden your at WOT, its a much longer turn. \n \nso another way to look at it is on the R6 throttle the amout of turn it takes to get it all the way turned to WOT......, and with the amount of turn on the F4i throttle tube your only 1/2 or 3/4 to WOT. \n \nracers buy quick turn thottles to get to WOT faster and easier, but we look for the opposite. so basibally its a long turn (or slow turn throttle mod) which makes it much more forgving, smother, and less sensitive. and give you more play. \n \nthanks for the offer, but i plan on holding on to this one for a bit.\r\n

Less than 1 minute ago
\r\n \r\n
\r\n Quote: \r\n
\r\n Quote: \r\n
\r\n Quote: \r\n
\r\n i looked at the same you guys did, but i was more familiar with the block offs. and it seemed to me to be achiving the same thing removing the AIS Quote: \r\n
\nidk, maybe im missed something, in the tought process of this. if anyone has insight let me know. \n \n \n \n \ni followed the same thing as the pic in the first quote. but capped it off instead of rerouting the hoses. here i\'ll explain......... \n \nfirst off........ you didnt do hose 3 did you.....?????? thats not right (you keep the stock hose\'s there and reconect them to the air box). hose number #1,#2, #4 is the way ive seen most guys do the "kleen air mod". \n \n \nim not sure if this is what other stunt guys call the "Kleen Air Mod". but i think the main pyrpose is to remove the AIS. i did the same thing just no hose\'s (i capped it all off) non stunt people do it all the time with smog block offs, i dont see what the problem would be. ive never heremoving the AIR/PAIR/smog peice should keep oil out of the air box (2 methods - reroute vent tube out of the air box OR cap off and eliminate it). \nim not a motorcyle tech, so if im wrong in any of this let me know...... \n \nto make a long story short........ \nwhat i did was installed smog block offs (just made my own block offs), removed the AIS/pair system, and blocked off the port in on the air box. \nOnce these are all capped off the air injection system can be safely removed. \n \nracers do this for 2 main reasons..... (but not to keep oil outof the air box) \n1 - to remove all unnecessary equipment from your bike for reduced weight and ease of maintenance. \n2- for mapping a bike. To get an accurate Air:Fuel (A/F) ratio when dynoing the bike. The air injection system pumps fresh air directly into the exhaust stream in order to burn off any unused fuel. Unfortunately by doing this the A/F ratio is thrown off by the extra “fresh air” in the exhaust stream. By removing the air injection system you can achieve an accurate A/F ratio. \nalso....... The smog block offs help to eliminate that backfire you get after installing aftermarket exhaust and eliminating the cat. they will decrease the backfiring/popping on decel b/c it\'s no longer pumping fresh air into the exhaust to burn off the unburned fuel \n \ndefinition - Smog Block Off Plates are designed to seal off the ports on the valve cover used by the air injection system (a.k.a smog pumps, PAIR or AIS). \n \nwhat i did - capped off where hose # 1 and #2 went. and i capped off where hose #4 originally went into the air box. \nthere for i did not need to a run a hoes out of the ports, or T them togeter, or need #4 hose that vents #1 and #2 (since #1 & 2 are sealed and blocked off). \n \nthese are the smog block offs...... (i did the same thing with out buying block offs) \n ![]() \n \nthis is what they look like installed....... (this is the proper way to remove the AIS) \n ![]() \n \n ![]() \n \nthis is what you remove...... (AIS/PAIR/SMOG SYSTEM) (pretty sure its the same thing as the top pic, unless im missin something) \n \r\n
Less than 1 minute ago
\r\n \r\n ok, change of plan with the kleen air mod. they way i did it is how race guys do it, but there not concerend with gettng oil in there air box.
\n \ni did not realize that hose #4 in the pics posted above was comming from the crank case breather. so if you do it this way you have 2 options for the crank case breather. one either go back and redo the way show on alloutmotorsports from zesus. \n \n \n \n \nor do it my way and...................
\n \n \nthis is hose #4!!!! it come out of the air box and needs to be extended to go to the tee! i cant belive i didnt catch that, im an idiot ![]() \n \ni didnt realize it before from looking at the other thread, thats way i did it this way. i just thought that hose # 4 was the other hose comming from the AIS and just vented out somewhere. \n \nall i need to do is take #4 below and put a breathable catch can or breather filter or smething like that. \n \n
Less than 1 minute ago
\r\n \r\n i guess there a few ways to get the job done, but according to cutler this is the best way........ (if i have any problems down the road with mine im gonna go this route other wise im gonna keep my set up) or if i have some spare time, i\'ll just redo it this way.
\ntook most of this off of !!A2K!!\'s post on SL (same thread as this just on SL) thanks !!A2K!!for talking to cutler and giving us this info!!!!!!! ![]() \ni wrote on the the top pic to expain a few things, and added in a few words to make it easier to understand. \n \nthis is right ^^^ \n \nalso.... cap off hole #1/#2 and cap off hole #4 in air box \n \n \n \nnow heres the extra step !!A2K!! and Cutler did.... he said it helped the oil breath even better and smoke less. i havent done it so i cant say for sure. but according to them its the best meathod. \n \nthis is under the breather hose plates (where the 2 hose\'s come out of to connect to the AIS) \n ![]() \npull it off and on there will be two screws and 2 plates take the 2 screws and four plates OUT \n ![]() \n \nthese are the 4 plates and screws \n ![]() \nput the metal housing back on the EXACT WAY it came off \n ![]() \nthen put the breather plate back on and your golden \r\n
Less than 1 minute ago
\r\n \r\n
\r\n \n Quote: \r\n
\n \n \nPlease tell me there is someone on here right now that can explain this to me. I\'m doing this to my bike right now but im confused about what to do with hose #4 in one picture the hose is run from the crank case up to the "T" where #1 & #2 are connected then in the other picture the hose goes directly from the crank case to the hole on the back of the air box just like stock???????? what is the right way???????? HELP AM I JUST DUNB AND DON\'T SEE IT????????????????\r\n
03-03-2010, 10:00 PM
im finally finished up 09/10 winter build....... (still need a little more test & tweek)
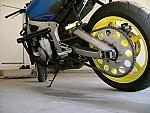
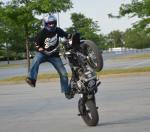
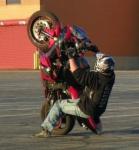
started out with a stock MINTY!!!! 05 R6 with 5000 miles......... even thouogh i still have a long way to go, its prob not the best move....... but tried to do everything right & top notch on this one. sold a lot of the stock & after market parts (keept a few of the AF though). and reinvested a lot back into it. i mixed and matched everything instead of being brand loyal, and tried to get the best of the best. luckily i found some good deals and got a few couple hook ups. but still dropped a ton of dough R6 Stunt build �atown cage �scrapeworks sub frame �omr sub cage �hohey big rotor kit dual caliper set up �left hand magura �scotts stabilizer �RSC ez pull �star custom front & rear seats �black f4i caliper for the hohey bracket �ebc hh pads for the HB caliper �DCP radiator cage �two brothers factory shorty exhaust �custom SI round bar to go on the scrapworks (thanks ian, your messurements were perfect on the bar & base, mine were off on the base...lol) �vortex rear sets �vortex 7* clip ons (flipped) with woodcraft bars �f4i throttle tube �reinforce stock stay (soon to be C4) �new chain and sprockets (0) (+6) still have a -1 & -2 incase i want more �hydro tuff tank �kleen air mod �12oclocklabs healer �DB DS windscreen �intigrated strip/bar style tail light �acerbis cyclops head light �power comander �bmc race filter �velcoity stacks �new grips �prob a bunch more stuff that I forgot���. �and always the little odds and ends that add up to still need to to do or order..... �SS front lines �SI front axel pegs �fan over ride switch �a couple custom stickers �set up front & rear suspention adjustments �test and tweek some more bike before the build......... pics of the tear down few ramdon shots of installing a few parts.... check out the difference of an R6 throttle tube to a f4i....... kleen air mod....... remove the air induction system (flip the reeds underneath the ports, & cap the port holes off). dont forget top cap off the port on the air box the AIS comes out of. scrapeworks subframe and making a round bar fit....... after some more work on the subframe and round bar............. [IMG] http://inlinethumb50.webshots.com/43...600x600Q85.jpg [/IMG] | |||||||||
|
« Next Oldest | Next Newest »
|
Users browsing this thread: 1 Guest(s)


\r\n


\r\n

:


\r\n